By Michael Patten
I have a curious relationship with Shopify. Whilst I enjoy the challenge of working with it to integrate various tracking aspects, I view the experience as being very similar to buying a twenty year old, French hatchback.
Yes, it’s great on fuel, the tyres last for ages and it sails through every MOT…although it does have those well-known problems. An airbag light that comes on when you slide the drivers seat back-and-forth? Water that makes its way into the interior light housing? Just fun quirks that you can easily overlook!
Clearly I’m not one to shy away from a terrible metaphor, but I feel like this is absolutely spot-on. Shopify is fantastic for businesses to sell goods in a simpler, streamlined way with templated sections for the more complicated parts of the process. It does fall down a bit when it comes to integrating a complete and well-rounded tracking setup, however.
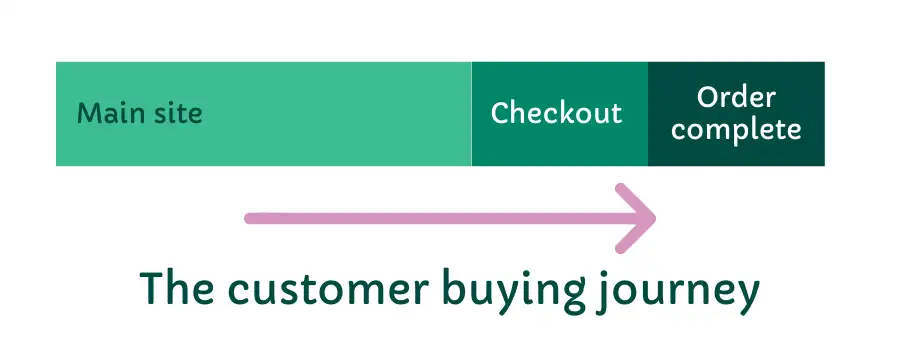
This is all caused by the many variables that can change from site to site. Firstly, you’ve got to view the site as three distinct parts:
- The main site
- The checkout process
- The Order Complete screen

The main site will read any code that is placed in the ‘theme.liquid’ file. It may or may not be read on the Order Complete screen. The checkout process is typically and frustratingly locked-down in terms of what can be read and pushed to the Data Layer, unless you are using a handy, paid-for third-party app that will ‘unlock’ it for you. Modifying the Add to Cart function can also throw in some new variables to tackle, as well as the many subtle differences between Shopify Basic, Standard and Plus. Then you’ve also got the headache of whether you serve analytics and ads platform tracking server-side or client-side, or both.
And trying to make that all compliant with the current ‘cookie regulations?’ A sizeable challenge, for sure.
Luckily for me (and for you reading this) getting the base-level Enhanced Conversions functionality integrated via the manual implementation method is reasonably straightforward.
Understanding the Checkout Object
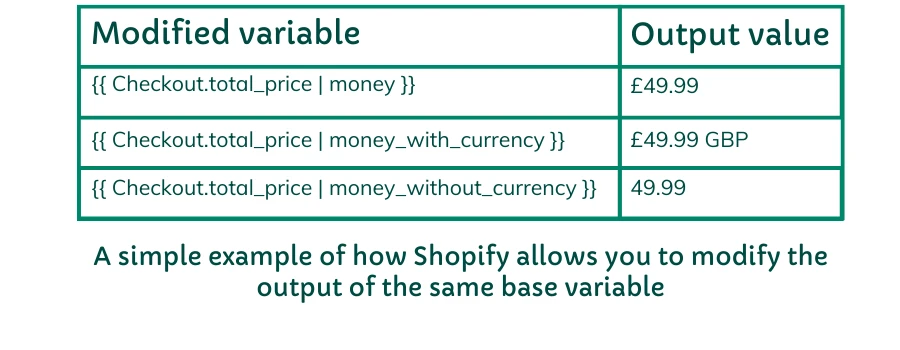
The Checkout Object provides a handy way of passing user and order information to the Data Layer upon order completion and conversion, without needing to rely on less-robust methods of data capture such as CSS selector variables. What’s more, some of the variable outputs available can be formatted in different ways. This is particularly handy for implementing Enhanced Conversions as, at the time of writing, it requires specific formatting to work without issue (see below).

For a full list of Checkout Object variables that can be utilised, check out Shopify’s developer guide.
But for today, we’ll be focusing on just the minimum needed for our Enhanced Conversions integration.
Understanding Enhanced Conversions
Google has created and released Enhanced Conversions as a supplement to Google Consent Mode, Google’s cookie-free tracking method for users that opt out of being served tracking and marketing cookies whilst they browse a website.
Where Consent Mode will pass relatively basic information regarding user interactions, Enhanced Conversions will look to give these interactions additional context based on the data that can be legally passed on from a user who is logged in to a Google account, be it via Chrome, YouTube, Android device etc.
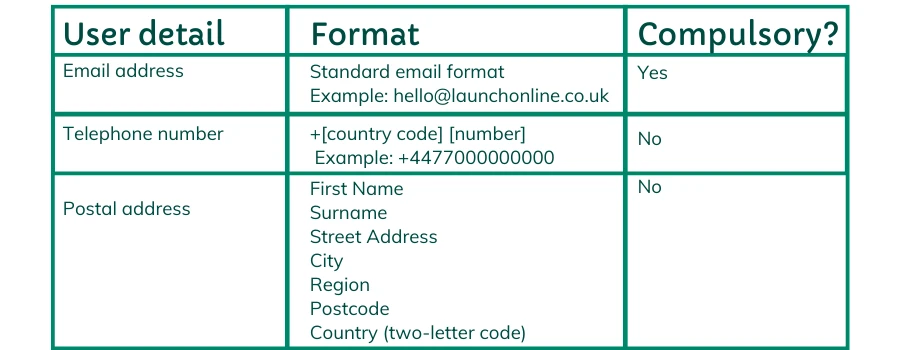
In order to match user account with on-site user, you will need to capture certain details in the Data Layer to be sent to Google via its own encryption methods. These details are:

To unlock the bare minimum capabilities of Enhanced Conversions, you should capture Email Address, which luckily requires the least amount of consideration to formatting.
The hook-up: pre-requisites
Before we go about the process of capturing the required user data, it is strongly advised that you have already performed the following:
- You are already have a sufficient cookie management platform, and therefore have the levers in place for user opt-ins and opt-outs.
- You already have Google Consent Mode integrated, to enable cookie-tracked or cookie-free methods depending on the user’s consent.
- You have confirmed that the privacy policy of the site you are working on is sufficient and compliant with Google’s terms.
- You have enabled Enhanced Conversions via the tickbox on the conversion action you are using to measure site purchases (which can be found within the Google Ads interface via Tools and Settings -> Conversions and selecting the conversion action in question, and then opened up the ‘Enhanced Conversions’ section)

- You have Google Tag Manager already installed and in use on the website
Note that it is also possible to set this up for those using gtag (Google’s Global Site Tag) for Ads tracking functions, however this guide will be focusing on just the GTM implementation – read more information on the gtag implementation on Google’s website.
Download: The Google Tag Manager Method
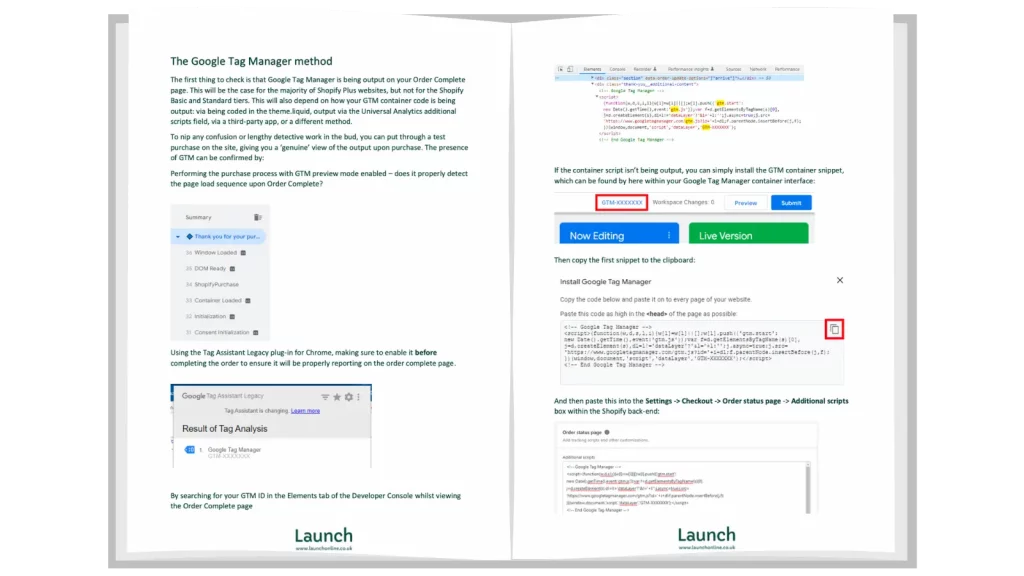
Now, this is the bit that takes a quite a bit of explaining. For clarity, and to save you flitting between tabs too much, we’ve walked through the how-tos in a handy document, which you can download for safekeeping.
The Google Tag Manager method: Getting Enhanced Conversions working in Shopify (PDF, 501KB)
Once you’ve done all that, it’s just the final steps to go!

Final steps – verification
Once you have implemented Enhanced Conversions via your chosen method, you will then have to keep an eye on your conversion action within the Conversions section of the Google Ads interface to check all is working accordingly.
For now, the most important aspect to keep track of is any status messages, particularly those that reference poor Match Quality. So far, we’ve found this flag to be overly sensitive, reporting poor match quality when using just the Email Address as the user data as a prompt to hook up more user provided data. Sometimes it will even falsely report, as after checking with Google Support one client had a 96% match rate and we were told to simply ignore the message.
That said, it is always worth investigating a ‘poor Match Quality’ message just in case the alert is real and action is needed.
At the time of writing, there is little available to help troubleshoot or measure the effect of the Enhanced Conversions integration, although Google has referenced that more will be coming in the near future. A common query we get from our clients is just how the integration has helped performance or boosted and existing Google Consent Mode integration, which at present is sadly not given within the client accounts themselves. For now, stats from Google’s own case studies are the best measure.
In any case, hopefully that has gone some way to helping you get up and running with Enhanced Conversions and Shopify. If you want more help getting all set up, get in touch with us today.


